
Mastering Reverb and Delay: Essential Tools for Depth, Dimension, and Clarity in Music Production

In the intricate world of music production, the judicious application of effects can elevate a static recording into a vibrant, immersive sonic experience. Among the most fundamental and transformative of these are reverb and delay. Once simply referred to as "delay effects" before the advent of more technical terminology, these processors are instrumental in imbuing mixes with spatial qualities, separation, and depth. Understanding their nuances, from routing and filtering to timing and decay, is crucial for producers aiming to craft polished and professional-sounding tracks. This comprehensive exploration delves into the strategic deployment of reverb and delay, offering insights and techniques that can redefine a mix.
The Genesis of Spatial Effects: From Echoes to Environments
The concept of creating sonic space in music predates digital audio workstations (DAWs) and sophisticated plugins. Early recording techniques often involved natural room reverberation, achieved by placing microphones in acoustically resonant spaces. As technology advanced, dedicated hardware units emerged, allowing engineers to simulate these natural spaces or create entirely new ones. The distinction between reverb and delay, while seemingly straightforward, lies in their fundamental operation: delay repeats a sound after a set interval, while reverb simulates the complex reflections of sound in an environment.
Historically, the terms were often used interchangeably, with "echo" being a common descriptor for any effect that involved a delayed repetition of sound. The evolution of music production saw the development of distinct algorithms and parameters for each effect, allowing for a far more nuanced control over sonic characteristics. The ability to manipulate pre-delay, decay time, diffusion, and frequency content has transformed these tools from simple sonic embellishments into essential components of the mixing process.
Strategic Application: Sends vs. Inserts for Cohesion
A common pitfall for novice producers is the indiscriminate use of reverb plugins as inserts on individual channels. While this approach might seem intuitive, it often leads to a dense, muddy mix lacking clarity and definition. Instead, the professional standard leans towards using auxiliary sends and returns for reverb and delay. This parallel processing method offers significantly greater control and flexibility.
The recommended workflow involves establishing a DAW mixing template that incorporates dedicated auxiliary tracks for reverb and delay. These aux tracks act as busses, to which multiple instruments can be sent in varying amounts. This technique effectively places disparate instruments within a shared acoustic space, fostering a sense of cohesion within the mix. A single fader on the effects return track allows for holistic control over the overall reverberant character of this simulated space.
Channel sends then become the mechanism for controlling the perceived distance of individual sound sources within that space. By adjusting the send level from each instrument channel to the reverb bus, producers can position elements closer or further away from the listener. This strategic placement is fundamental to creating a well-defined three-dimensional soundstage, avoiding the haphazard application of effects and instead ensuring each element occupies its intended sonic location.
Creating Depth: The Nuances of Pre-Delay and Decay
The perception of depth in a mix is not solely determined by the amount of reverb applied; rather, it is a function of how the effect is shaped to complement the surrounding sonic elements. Two critical parameters for achieving this are pre-delay and decay time.
Pre-delay introduces a brief temporal gap between the initial dry signal and the onset of the reverberation. This seemingly small interval is one of the most powerful, yet often misunderstood, controls in reverb processing. By precisely adjusting pre-delay, producers can influence the perceived clarity and spatial character of the reverb.
-
Longer Pre-Delay: A longer pre-delay, typically in the range of 30-100 milliseconds, creates a distinct sense of spatial depth. It allows the initial transient of the sound to remain clear and intelligible before the reverberation washes over it. This is particularly effective for vocal reverbs, ensuring that the lyrical content remains prominent and easy to understand, even within a spacious sonic environment.
-
Shorter Pre-Delay: Conversely, a shorter pre-delay, often just a few milliseconds, can more closely mimic the natural feel of sound reflecting within a physical room. This can be beneficial for percussive elements, where a subtle sense of natural ambience is desired without sacrificing the impact of the initial hit.
The decay time of a reverb, often referred to as the "RT60" (reverberation time for 60 dB of decay), dictates how long the reverberant tail lingers. This parameter must be carefully matched to the tempo and density of the song to avoid sonic clutter.
-
Short Decay Times (0.5 – 1.2 seconds): These settings produce a controlled, modern sound that is tight and well-defined. They are ideal for genres where precision and clarity are paramount.
-
Moderate Decay Times (1.5 – 2.5 seconds): This range offers greater flexibility, providing a natural-sounding ambience that remains transparent within the mix. It’s a versatile choice for a wide array of musical styles.
-
Longer Decay Times (over 3 seconds): These extended decay times are employed to create vast, atmospheric soundscapes. However, their use requires careful consideration, as they can easily overwhelm a mix and obscure other elements if not managed judiciously.
To effectively synchronize decay times with the project’s tempo, producers can utilize online calculators or DAW features that convert BPM (beats per minute) to milliseconds. For instance, a 120 BPM song has a quarter note pulse of 500 milliseconds, an eighth note of 250 milliseconds, and so on. This rhythmic alignment ensures that the reverb tail complements, rather than conflicts with, the musical timing.
Filter Cleanup: Sculpting Reverb and Delay for Clarity
The introduction of spatial effects can sometimes bring unwanted sonic artifacts, such as muddy low frequencies or sibilant high frequencies, that can obscure other elements in the mix. To counteract this, the strategic use of equalization (EQ) is indispensable. Inserting EQ plugins either before or after the reverb or delay effect in the signal chain provides precise control over the frequency content.
-
High-Pass Filtering (HPF): Applying a high-pass filter to the reverb or delay send is a standard practice to prevent low-end buildup. This removes unnecessary sub-bass frequencies from the reverberant tail, which can otherwise contribute to muddiness and consume headroom. A typical starting point might be around 100-200 Hz, but this can be adjusted based on the specific instrument and desired effect.
-
Low-Pass Filtering (LPF): Conversely, a low-pass filter can be used to tame harsh or piercing high frequencies. The bright, decaying tail of a reverb can sometimes mask the clarity of instruments like vocals or cymbals. By rolling off the extreme high frequencies of the reverb, its intelligibility can be preserved.
-
Mid-Range Sculpting: The mid-range frequencies, particularly between 300 and 600 Hz, can often be the source of "boxiness" or a generally clouded sound. A subtle, broad cut in this region on the reverb or delay return can significantly improve the overall clarity of the mix.
It’s important to recognize that filtering is not merely a corrective measure; it’s an integral part of creating desirable spatial effects. Many modern reverb and delay plugins incorporate built-in filters, allowing for intuitive tone shaping. For instance, a brighter reverb can feel closer and more immediate, while a darker, more filtered reverb tends to recede into the background, creating a sense of distance.
A powerful technique for controlling the perceived volume of reverb and delay tails, particularly during dense musical passages, involves sidechain compression. By inserting a compressor on the effects return track and using the dry signal of the main element (e.g., vocals) to trigger it, the reverb or delay can be momentarily "ducked" out of the way whenever the dry signal is present. Matching the compressor’s release time to the song’s tempo is crucial for a smooth and musical effect.
Delay as a Tool for Space and Clarity
While reverb excels at creating a sense of ambient space, delay can often be a more effective tool for adding spatial character while simultaneously maintaining clarity and definition. This is particularly true when employed as a rhythmic or textural element.
-
Rhythmic Delay Divisions: By setting delay times to musical divisions such as quarter notes (1/4), eighth notes (1/8), or dotted eighth notes (dotted 1/8), the delay effect can become an integral part of the song’s groove. This transforms the delay from a mere echo into a rhythmic companion that moves in sync with the music. A dotted eighth note delay on vocals, for example, is a classic technique for filling the space between vocal phrases without creating a distracting echo.
-
Feedback Control: The feedback control on a delay unit determines the number of repetitions. While excessive feedback can lead to a chaotic sound, controlled feedback can create interesting rhythmic patterns and textural layers. However, in most mixing contexts, restraint is key, unless the intention is to emulate dub music, where pronounced delay feedback is a signature element.
-
Filtering Delays: Similar to reverbs, delays can also benefit from filtering. Applying EQ before and after the delay effect allows for precise shaping of the repeated signal. This is especially useful when the delay signal feeds back, as filtering can help to control the evolving tonal character of the repeats. For vocals, a filtered delay can expand and complement the sound without overshadowing the lead performance.
Combining Reverb and Delay: Layered Spatial Effects
The synergy between reverb and delay can be harnessed to create exceptionally rich and complex spatial textures. A time-honored technique involves chaining these effects, feeding the output of a delay into a reverb, or vice versa.
For instance, instead of applying a single, long reverb to a vocal, one can opt for a delay send. The dry vocal is sent to a delay, and the delayed signal is then sent to a reverb. This creates a more intricate and layered spatial effect:
- The initial vocal signal remains clear and present.
- The delay provides a distinct, timed repetition.
- The reverb then adds a diffused, ambient tail to the delayed signal, creating a sense of depth and dimension without the sonic ambiguity of a single, long reverb tail.
The result is a defined space around the sound that feels both expansive and controlled, enhancing the presence of the element without obscuring it.
A Practical Example: Processing a Lead Vocal
To illustrate these principles, consider the processing of a lead vocal:
-
Send to a Short Plate Reverb: A subtle plate reverb with a relatively short pre-delay (e.g., 20-40 ms) and a moderate decay time (e.g., 1-1.5 seconds) is applied. This adds a touch of brightness and presence, simulating a small, reflective surface.
-
Send to a Slapback Delay: A short, single-repeat slapback delay (around 50-120 ms) is applied. This delay is timed to create a subtle thickening or doubling effect, adding a sense of dimension and pushing the vocal slightly forward in the mix.
-
Send to a Longer, Filtered Reverb: A separate aux send is used for a larger, more ambient reverb, perhaps a hall or a modulated reverb. This reverb would have a longer decay time (e.g., 2-3 seconds) but would be heavily filtered, with a high-pass filter to remove low-end rumble and a low-pass filter to tame excessive brightness.

This multi-layered approach ensures that the vocal remains upfront and intelligible due to the short pre-delay and slapback, while still possessing an expansive, spatial quality from the longer, filtered reverb.
Automation: Dynamic Spatial Effects
The dynamic nature of song arrangements, often characterized by sparse verses and dense choruses, necessitates a flexible approach to effects processing. Applying identical reverb and delay settings throughout an entire song can lead to sonic stagnation. Automation within the DAW provides the solution, allowing producers to tailor effects to specific passages and enhance emotional impact.
-
Verse Automation: During quieter verses, producers might increase the send levels to reverb and delay, creating a more expansive and ethereal atmosphere. This can draw the listener into the lyrical narrative.
-
Chorus Automation: As the chorus builds, automation can be used to subtly reduce the reverb and delay send levels, bringing the vocals and other lead elements forward and enhancing their impact. Conversely, in some cases, a dramatic increase in reverb or delay might be used to accentuate a powerful chorus or a specific vocal flourish.
-
Transition Automation: Automation can also be employed to create dramatic shifts in spatial character during transitions between sections. For example, a vocal might have a very dry and intimate sound in a pre-chorus, followed by a sudden surge of reverb and delay as the chorus hits, creating a sense of release and power.
By dynamically adjusting send levels, decay times, and other effect parameters, producers can imbue their mixes with a greater sense of intention and expression, mirroring the emotional arc of the music.
Essential Tools and Plugins
Most DAWs come equipped with a robust selection of built-in reverb and delay plugins. For instance, Logic Pro X offers the QRS reverb, a capable tool for general use. For those seeking more specialized or free options, the Valhalla Supermassive reverb is highly regarded for its user-friendly interface and expansive sonic capabilities.
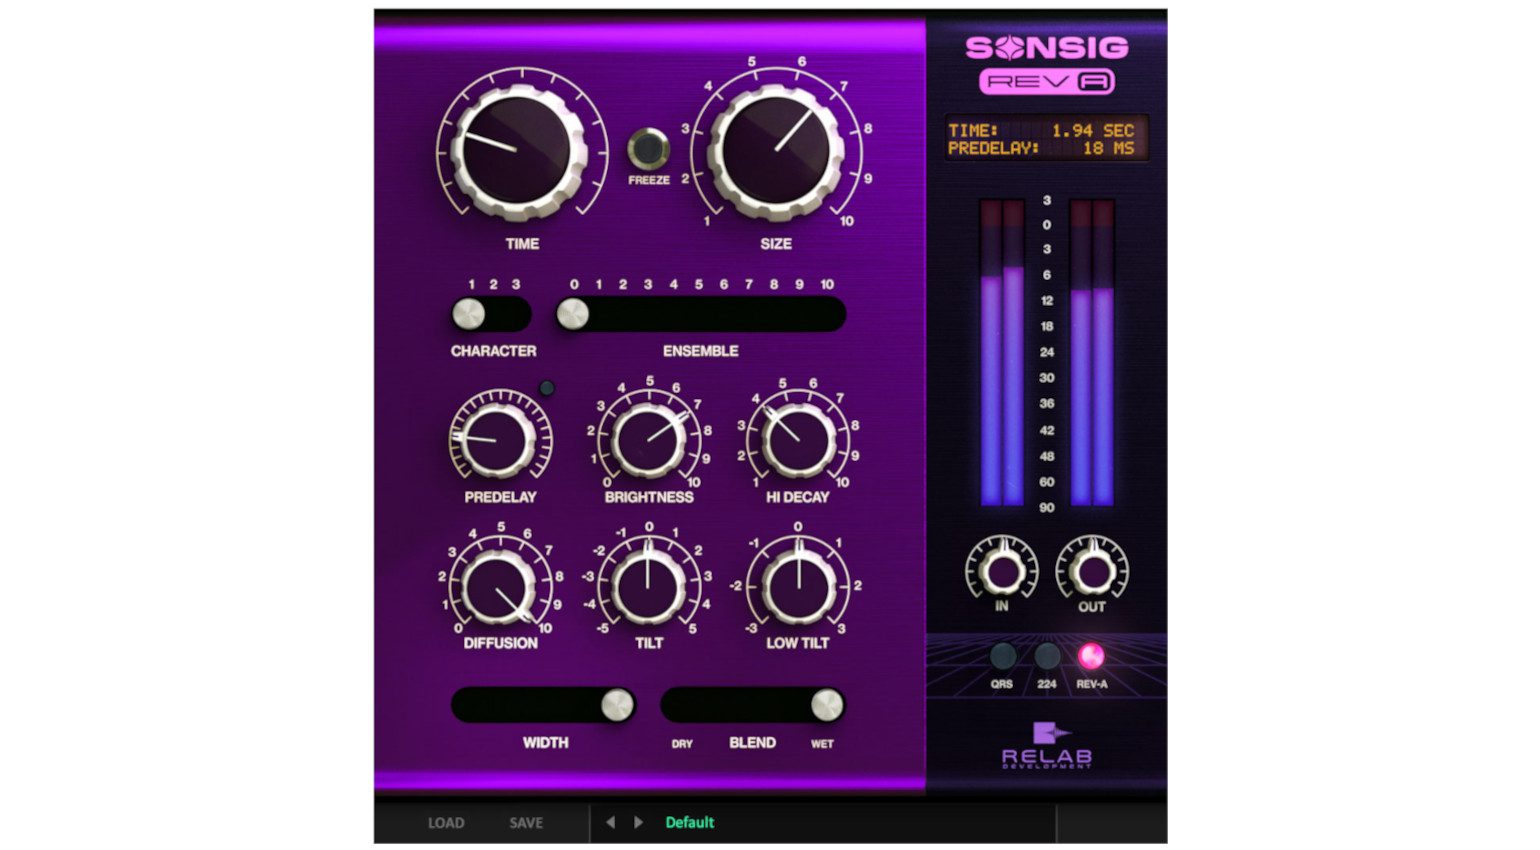
On the more premium end, the Sonsig Rev-A from Relab Development offers a compelling blend of modern and vintage reverb characteristics, making it a valuable addition to any producer’s toolkit.

For delay effects, if a DAW’s native offerings are insufficient or if a different sonic character is desired, the TAL-DUB-III is a free and accessible option that provides tempo synchronization, filtering, and saturation. For producers seeking a more advanced and creatively inspiring delay plugin, Soundtoys EchoBoy remains a benchmark, offering a vast array of emulations and sonic manipulation possibilities.
Conclusion: The Art of Sonic Placement
Reverb and delay are far more than mere embellishments; they are fundamental tools for spatial placement within a three-dimensional soundstage. By mastering their application through strategic sends, precise filtering, and nuanced timing, producers can imbue their mixes with width, depth, and clarity without resorting to over-production. The ability to control effects with precision, shape their frequency content, and utilize timing parameters to create separation allows for the creation of mixes that are both expansive and intimately detailed. When executed with intention, these spatial effects transform static recordings into dynamic, immersive sonic landscapes that engage the listener on a profound level.
Further Exploration:
For those seeking to deepen their understanding and proficiency with reverb and delay, continued exploration of advanced techniques, experimentation with different plugin types, and attentive listening to professionally mixed tracks are invaluable. The journey of mastering these essential effects is an ongoing process, rewarding those who invest the time and effort with significantly enhanced production capabilities.


